What’s in Your Sound Report
by: Tommy Schaeffer
Senior Audio Engineer, Polymathus, LLC
I’ve often heard the same questions from new clients or found myself saying the same thing many times through the years when I deliver audio content, so I decided to jot some things down here for you. Hopefully the information herein provides helpful insight to your new audio deliverables and content!
You can download a one-page .PDF file of these Production Sound Mixing Deliverables right here on my downloads page as well!
Congratulations, you have audio!
Here’s a general breakdown of what each of your delivered audio files have in them. This is a general description of all types of recording, some simple and some more complex with multiple inputs/actors, etc., so the “mileage” you get from the information in this abstract may vary.
Introduction & Background
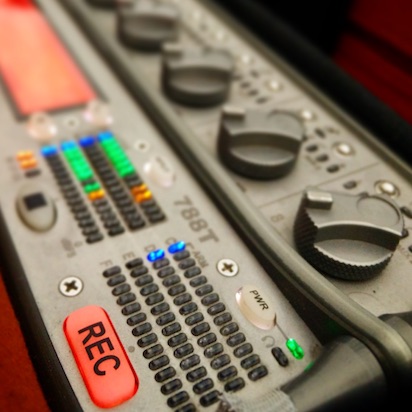
I use the Sound Devices 788T Field Mixer/Recorder. This mixer is equipped with 8 inputs, and up to 12 isolated (ISO) tracks for recording. An input is a channel used to record a single device like a boom mic, lavalier mic, boundary mic, plant mic, etc. A track is a “location” on the recorder’s hard drive (or other media) used to store waveform information. Inputs are designated by numbers and tracks with letters. The difference is important and described in the following section, “What I Record.”
What I Record
The overall gain (or power) of an input is adjusted by two controls, its Input Trim and its Input Fader. The input trim is often thought of as a coarse gain control while the input fader is equated to the fine gain control. The core of my existence as an on-location audio engineer is to maintain the delicate balance between these two controls so that the resulting audio recorded is neither too quiet (rendering it unusable or inaudible) nor too loud (where irreparable clipping or distortion will occur).
For any given input, I record two tracks of audio: pre- fader and post-fader. There are many advantages to doing this, but here’s the technical description of each: When recording to a pre-fader track, the signal coming from the input is sent directly to the recorder. It remains unaffected by changes I make to the fader (the fine gain adjustment). When recording to a post-fader track, the signal coming from the input goes through the fader and is adjusted. Post-fader tracks are almost always the best, because, afterall, that’s my job as an audio mixer–to be adjusting those gain knobs to get the best sound for you. But of course, sometimes mistakes happen or levels adjusted for in rehearsal end up being performed completely different by the actor.
Also, any filters, effects, limiters or compressors that may be “on” during a take, only affect the post-fader track recording. So for instance, if we’re in a high wind situation and the “fuzzy” on the microphone isn’t cutting the wind like we want it to, I may drop a lo-cut filter on that channel in order to pull out some of that rumbling right on location as we record it. But what if we get into post and the studio has a better algorithm to cut the noise? Sweet, use the pre-fader track and re-apply your own custom lo-cut filter. Another example: we may be recording a subject whispering a bunch of dialog but then firing a gun. In this case I may put a limiter on that channel so I can crank up the gain to get the delicate whispers, but “limit” recording to anything above -3 DbFS so the waveform doesn’t clip when the gun is fired. What if you’re doing some edgy sound design and actually wanted the clipping? You guessed it, use that pre-fader track.
How do you know which one to use? Your ear and/or studio monitors will be the final judge, so regardless of the technicals or science behind it, if you just seem to like pre-fader better–use it! Also, listen closely to room tone. I generally adjust “up” in the post-fader tracks, so for noisy situations, the pre-fader tracks tend to be better. Again–trust your ears and pick your favorite.
The Sound Report
Each sound report contains a description of all audio files recorded on a given production day. Use the header information to find the shooting day, location information, equipment used and high level information about the files. Then in the detailed section of the report, you will find descriptions and a breakdown of all the tracks included in any given file.
For each take, you will see a description of all the tracks included in the single “interleaved” .wav file. In addition to a pre-fader recording for each track, you will also see a stereo mix. The stereo mix is a left-right pair of tracks that is a mix-down of all inputs being recorded on the given take. These are the post-fader recordings. Unless otherwise noted, the boom records to the left and the wireless mics record to the right. This is very useful for creating quick rough cuts before you have a chance to comb through all the ISO tracks to use in your final cut. In simple set ups, you may find that the stereo mix is fine and can be used all the way through to the final–a great short cut. More realistically, however, to craft that perfect mix, you should dig in to the ISO tracks and use the dedicated recordings. If multiple subjects are in a scene and one subjects mic gets hit with radio interference, or another endures clothing rustle, it is permanently “in the mix” and may be undesirable.
This is a lot of information, but hope it helps clear up what you see in the audio files delivered! Of course, if you have any questions, don’t hesitate to call or email!


